You mixed your dough. You kneaded it. Now it's sitting in a bowl and you're staring at it, wondering how long you're supposed to wait before it's actually ready.
That waiting period is proofing - and it's one of the most important (and most misunderstood) parts of making pizza at home. Getting it right is the difference between a crust with real flavor and structure, and one that's either dense and bready or flat and lifeless.
This guide covers everything: what's actually happening inside your dough while it proofs, how temperature controls the entire timeline, how to tell when it's ready, and what to do when things go wrong. If you've ever searched "how long should pizza dough proof" and gotten a vague answer, this should fix that.
What Proofing Actually Is (And Why It's More Than Just "Rising")
Most recipes describe proofing as "letting the dough rise," which is technically true but misses the point. The rise is a visible side effect of a much bigger process happening at the microscopic level.
When you mix flour, water, and yeast, you're creating a living system. The yeast (Saccharomyces cerevisiae - the same species whether you buy instant, active dry, or fresh) starts consuming sugars and producing two key byproducts: carbon dioxide gas and ethanol. The CO2 gets trapped inside the gluten network you built during kneading, which is what makes the dough physically expand. The ethanol and various organic acids contribute to flavor.
But here's what most proofing guides skip over: the yeast isn't just eating sugar that's sitting around waiting. Wheat flour is mostly starch, and starch is a complex carbohydrate that yeast can't directly consume. Enzymes naturally present in the flour - specifically amylase - have to break that starch down into simpler sugars (mainly maltose) before the yeast can use it. That enzymatic breakdown takes time, and it's one of the main reasons longer proofs produce better-tasting pizza.
So when you let dough proof, three things are happening simultaneously:
Enzymes are breaking down starch into sugar. This feeds the yeast and also leaves behind residual sugars that caramelize during baking - giving you better browning and deeper flavor.
Yeast is converting sugar into CO2 and alcohol. The CO2 creates the airy structure. The alcohol and other fermentation byproducts contribute to the complex flavor you associate with good bread and pizza crust.
The gluten network is relaxing. Over time, the protein bonds in the dough loosen. This is why a freshly kneaded dough ball snaps back when you try to stretch it, but a well-proofed one stretches easily and holds its shape. If you've ever fought a dough ball that won't cooperate, it probably needed more proofing time. The hydration guide covers how water content also plays into this.
Understanding these three overlapping processes is the key to understanding everything else in this guide. Proofing isn't passive waiting - it's the dough doing essential work.
Temperature: The Single Most Important Variable
If there's one thing to take away from this entire post, it's this: temperature controls everything about proofing. The amount of time your dough needs, the flavor it develops, how forgiving the timing window is - all of it comes back to temperature.
Yeast is a living organism, and like all living organisms, its metabolism speeds up when it's warm and slows down when it's cold. The rule of thumb is that yeast activity roughly doubles for every 15 degrees F (8 degrees C) increase in temperature. That exponential relationship is why small temperature differences produce big changes in proofing behavior.
Room Temperature Proofing (68-75 degrees F / 20-24 degrees C)
This is the default for most pizza recipes. At typical room temperature, you're looking at roughly 1.5 to 4 hours for a standard dough to reach its peak, depending on how much yeast you used and the exact temperature of your kitchen.
Room temperature proofing gives you a decent balance between speed and flavor. The yeast is active enough to produce meaningful rise within a few hours, and the enzymes have enough time to convert some starch into sugar. It won't match the flavor complexity of a cold ferment, but for same-day pizza it works well.
The challenge is that the window between "perfectly proofed" and "overproofed" is relatively narrow at room temperature. On a 75 degrees F day, your dough might be perfect at 3 hours and past its prime by 4.5. On a 68 degrees F day, that same dough might need 5 hours. If your kitchen runs warm in summer, you'll need to adjust.
The PizzaLogic calculator accounts for this by adjusting yeast amounts based on your target fermentation time and temperature, so you're not guessing.
Warm/Oven Proofing (85-100 degrees F / 30-38 degrees C)
When you need dough faster, raising the temperature is the most effective shortcut. At 85-100 degrees F, proofing can happen in as little as 30 to 60 minutes.
The most common way to do this at home is the oven method:
- Turn your oven on for about 1 minute, then turn it off. You want it barely warm - not actually hot.
- Place a pan of boiling water on the bottom rack. This creates humidity that prevents the dough from drying out.
- Put your covered dough on the middle rack and close the door.
- Check it after 30 minutes.
Some ovens have a "proof" or "bread proof" setting that holds around 80-100 degrees F, which works perfectly. If your oven has an oven light, turning it on with the door closed often generates enough gentle heat (around 80-90 degrees F in many ovens) to speed things up without risking overproofing.
The tradeoff: warm proofing gets you volume, but it shortcuts the slow enzymatic work that creates flavor complexity. The yeast races through available sugars before the enzymes can fully do their job breaking down starches. The result is a dough that rises fine but tastes more like plain bread than properly fermented pizza crust. For a same-day dough when time is tight, this is a perfectly valid approach. Just know what you're trading.
Cold Proofing / Retardation (35-41 degrees F / 2-5 degrees C)
Cold proofing is where things get interesting, and it's the method I use almost exclusively for my own dough at this point.
At fridge temperatures, yeast metabolism drops to roughly 5-10% of its room temperature rate. But here's the key insight: the enzymes that break down starch don't slow down nearly as much as the yeast does. This mismatch is what makes cold fermentation so powerful.
While the yeast is barely ticking along, the enzymes are steadily converting starch into simple sugars and breaking down proteins. That slow work produces three things you can't fake with a quick proof:
- Better flavor. The extended enzymatic activity creates organic acids (lactic and acetic) that give cold-fermented crust its characteristic complex, slightly tangy taste. Different temperatures favor different acids - colder temps tend to produce more lactic acid (milder, yogurt-like), while slightly warmer temps favor acetic acid (sharper, more vinegar-like).
- Better browning. All those sugars the enzymes freed up? The yeast doesn't consume them all because it's working so slowly. The leftover sugars are available for the Maillard reaction during baking, which is what gives you those beautiful dark spots and deep color.
- Easier handling. Extended time allows the gluten to fully relax. Cold-fermented dough stretches almost effortlessly compared to same-day dough.
The practical proofing window for cold fermentation is 24 to 72 hours, with some doughs stretching to 96 hours. That wide window is one of its biggest advantages for home bakers - you have days of flexibility instead of hours. Mix on Thursday, bake on Saturday. Or Sunday. Your call.
I wrote a full deep-dive on cold fermentation that covers the method in much more detail, including yeast adjustments, flour selection, and troubleshooting.
Quick reference: Temperature, time, and flavor
| Environment | Temperature | Typical Duration | Flavor Complexity | Timing Flexibility |
|---|---|---|---|---|
| Warm/Oven Proof | 85-100 degrees F (30-38 degrees C) | 30-60 minutes | Low | Very narrow |
| Room Temperature | 68-75 degrees F (20-24 degrees C) | 1.5-4 hours | Moderate | Moderate |
| Cold Proof (Fridge) | 35-41 degrees F (2-5 degrees C) | 24-72+ hours | High | Very wide |
The Two Phases of Proofing: Bulk Fermentation and Ball Proof
Most pizza dough goes through two separate proofing phases, and they serve different purposes. You'll sometimes see these referred to by their Italian names - puntata (bulk fermentation) and appretto (ball proof) - but the concepts are straightforward.
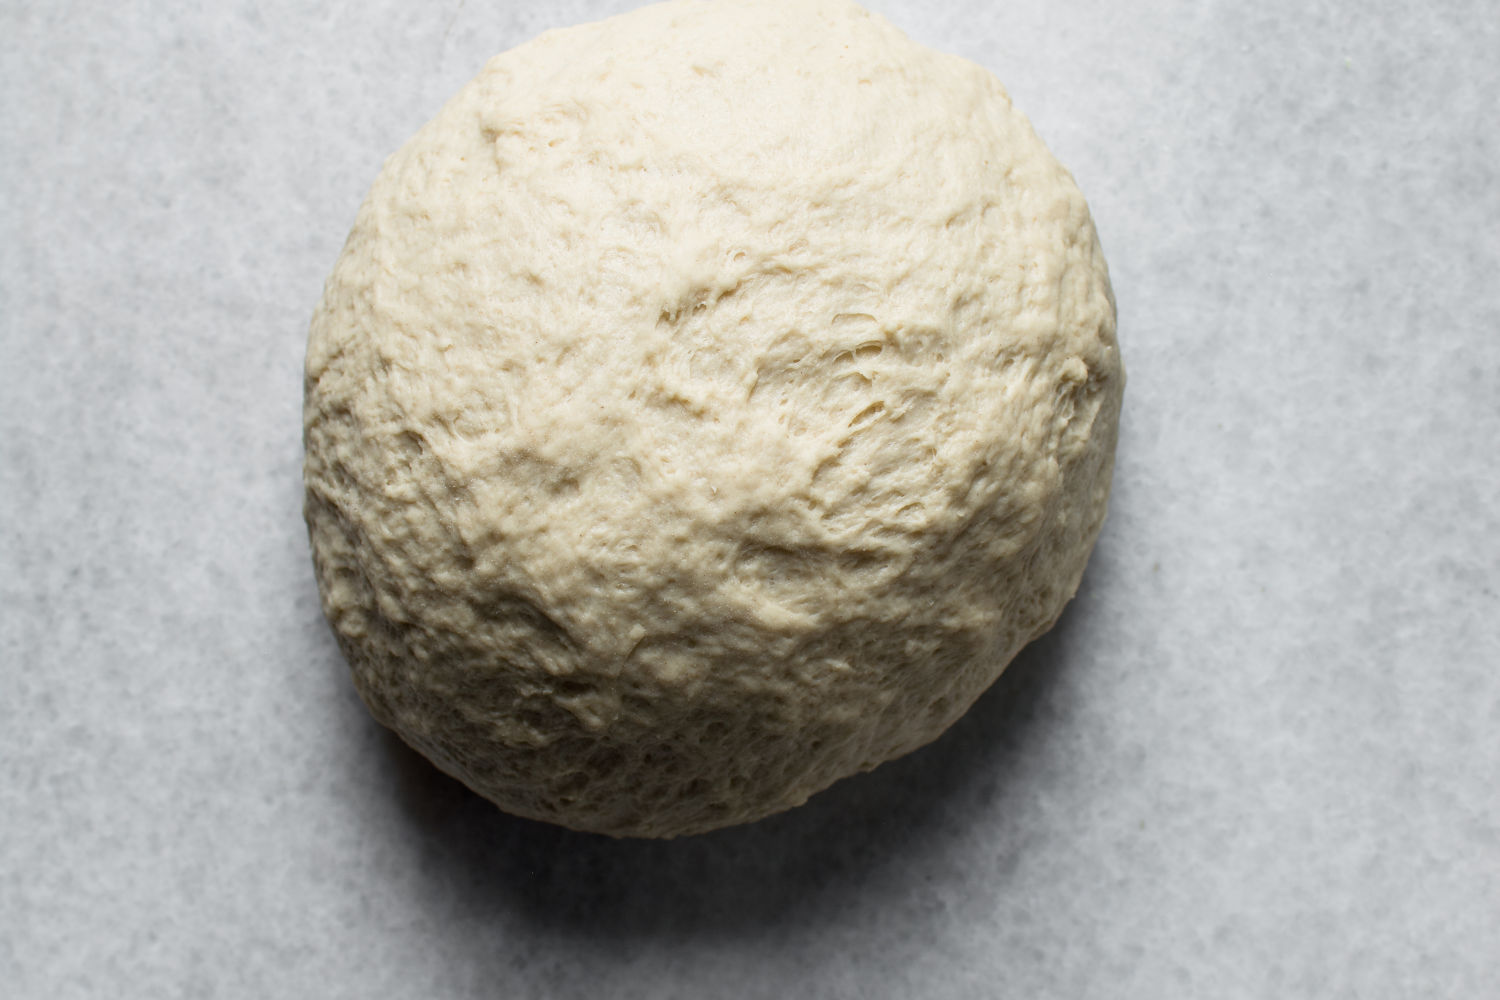
Bulk Fermentation (First Rise)
Right after mixing and kneading, the dough rests as one large mass. This is bulk fermentation.
During this phase, the gluten network is capturing its first CO2 bubbles and beginning to develop structure. The weight and pressure of the full dough mass actually helps - it creates internal pressure that inflates the gluten matrix from within, building strength.
For higher-hydration doughs (70%+), this is usually when you do stretch-and-fold sets. Each set realigns the protein strands, increasing the dough's ability to expand without tearing.
Bulk fermentation typically continues until the dough has increased in volume by about 50% to 100%. The exact target depends on your recipe and whether you're doing a room temperature or cold ferment.
A note on cold ferment strategy: There are two approaches to bulk fermentation with cold proofing. Some bakers do a short bulk ferment (1-2 hours at room temperature) before balling and refrigerating. Others skip the room temperature bulk entirely and put the whole mass straight into the fridge, then ball it later. Both work, but the warm bulk approach gives the yeast a head start and can produce slightly more volume. The cold-from-the-start approach is simpler and gives you more control, especially for longer ferments. The cold fermentation guide breaks this down in more detail.
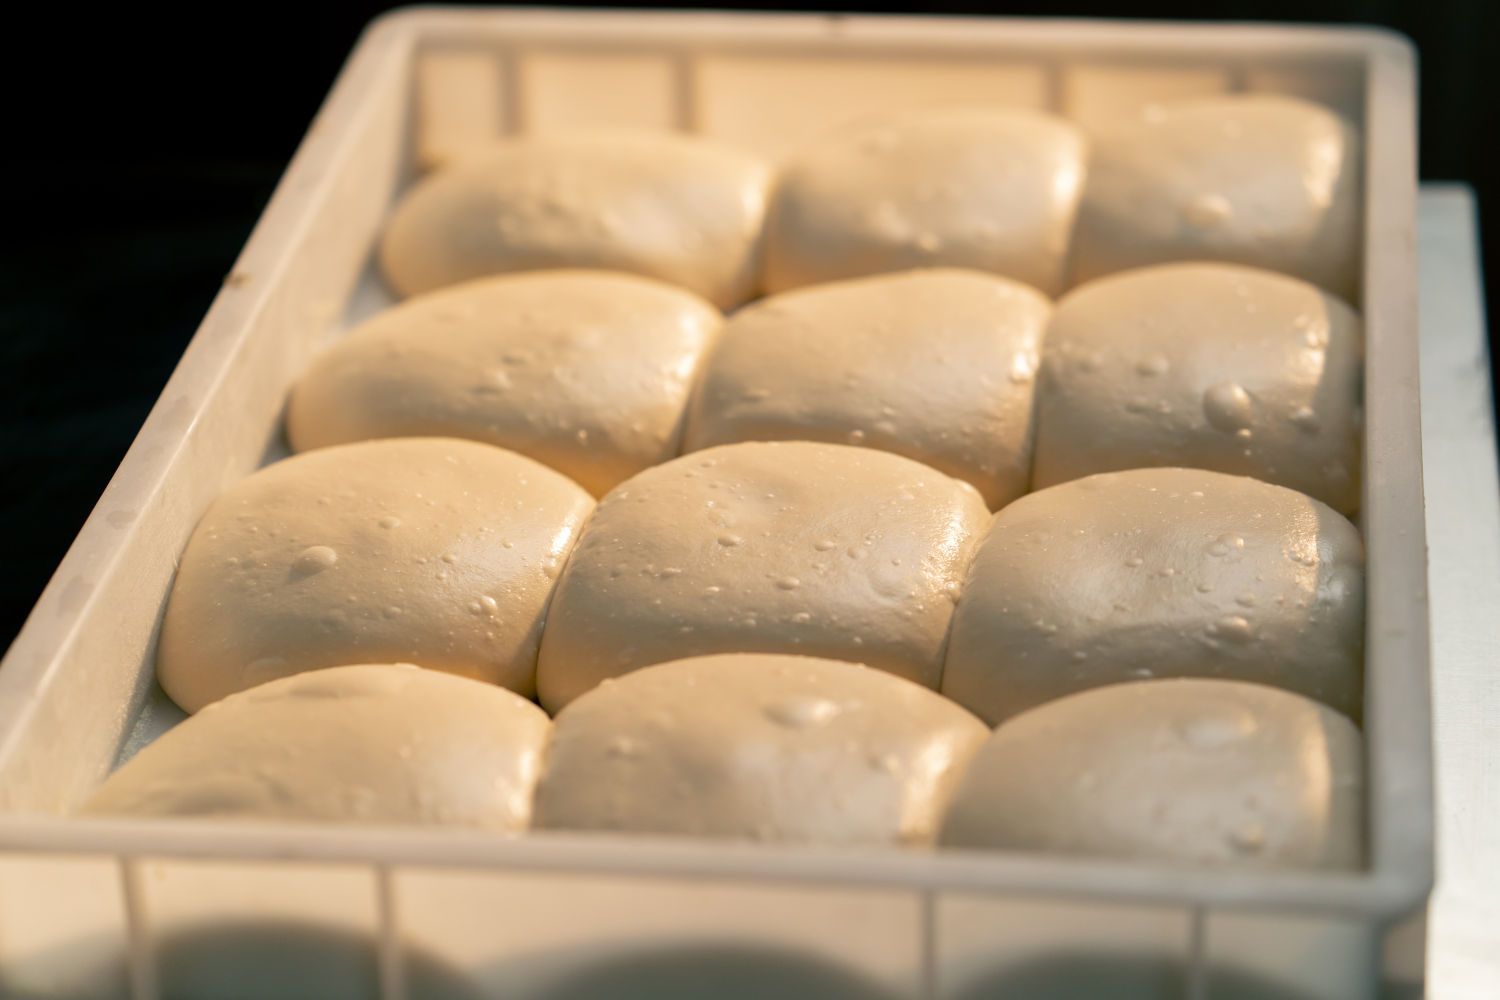
Ball Proof (Second Rise)
After bulk fermentation, you divide the dough and shape it into individual balls. This step does more than just portion the dough - it creates surface tension.
Proper balling technique involves tucking the edges of the dough underneath itself to create a smooth, taut outer skin. That tension acts like a structural container. As the dough continues to ferment during the ball proof, the surface tension keeps the ball expanding upward and outward evenly instead of just spreading flat.
If you skip balling or do it loosely, your dough balls will pancake during the final proof. If you ball too tightly, the dough will fight you when you try to stretch it.
After balling, the dough needs time to relax before you can stretch it into a pizza. At room temperature, this usually takes 1 to 3 hours. If your balls came straight from the fridge, plan for 1 to 2 hours of tempering at room temperature before baking. You'll know they're ready when they feel soft and pillowy, and when they yield gently to a light press without snapping back aggressively.
Adjusting Yeast for Different Proofing Times
This is one of the most common mistakes home pizza makers make: using the same amount of yeast regardless of how long they plan to proof.
Here's something that surprises a lot of people: cold-fermented doughs should actually use more yeast than same-day room temperature doughs, not less. The fridge slows yeast activity so dramatically (down to roughly 5% of its room temperature speed) that even with 24 to 48 hours of total time, you need a higher yeast percentage to get adequate rise. A 24-hour cold ferment typically calls for nearly double the yeast of a 6-hour room temperature proof.
Where people run into trouble is using a recipe's yeast amount without adjusting for their actual schedule. If a recipe was designed for a 24-hour cold ferment and you leave the dough at room temperature for 8 hours instead, that amount of yeast at warm temperatures will massively overproof the dough. The yeast will exhaust its food supply, the gluten will break down from excess acid production, and you'll end up with a flat, gummy, alcohol-smelling mess.
Here's how the amounts typically break out (these are IDY percentages relative to flour weight):
- Same-day / room temperature (5-6 hours at ~72 degrees F): around 0.1% to 0.15% - the least yeast, because warmth makes it so efficient
- 24-hour cold ferment (2h RT + 22h fridge): around 0.2% to 0.23% - the most yeast, because fridge temps slow activity dramatically and 24 hours isn't long
- 48-72 hour cold ferment: around 0.13% to 0.17% - less than 24h because the extra days give the yeast more time to work, even at fridge speed
If those numbers look low compared to other recipes, they are - and that's on purpose. Most pizza recipes online call for something like 0.5% to 1% instant dry yeast, sometimes more. Those amounts will absolutely make dough rise, and for a lot of home bakers they work fine. But they're overshooting by a wide margin.
Recipe writers tend to treat yeast as a binary ingredient: either you have enough for the dough to rise, or you don't. So they err on the generous side to guarantee results even if conditions aren't ideal - maybe the kitchen is cool, maybe the yeast is old, maybe the measuring isn't precise. It's a reliability play, not a flavor play.
The problem is that excess yeast doesn't just make dough rise faster - it tears through the available sugars before the flour's enzymes have time to do their best work. Those enzymes are what convert starch into the simple sugars that drive Maillard browning and create flavor complexity. When there's too much yeast, it eats those sugars as fast as they're produced, leaving nothing behind for browning or flavor. You get a dough that rose great but tastes like plain bread and bakes pale.
The PizzaLogic calculator uses a calibrated formula based on the Lehmann method that calculates the minimum effective yeast for your specific time and temperature. Less yeast means the fermentation unfolds more gradually. The enzymes have time to work ahead of the yeast, building up a reserve of sugars and organic acids that translate directly into better crust color, more complex flavor, and a more open, airy crumb. It's the same dough, same flour, same fermentation time - the only difference is precision with the yeast, and the results are noticeably better.
If you've been using recipes with higher yeast amounts and getting decent pizza, you're not doing anything wrong. But if you've ever wondered why your crust doesn't brown like the photos or why the flavor feels flat compared to a good pizzeria, this is very likely why.
Yeast type matters too. Instant dry yeast (IDY), active dry yeast (ADY), and fresh compressed yeast all behave slightly differently. If your recipe specifies IDY and you're using ADY, multiply the amount by 1.25. For fresh yeast, multiply by 3. These aren't perfect conversions, but they're close enough for pizza. The yeast guide covers all three types in detail.
What Sugar, Malt, and Other Additions Do During Proofing
The flour's native starch is the primary fuel source for yeast, but adding supplemental sugars or malt can meaningfully change how your dough ferments and how your crust bakes.
Sugar (Sucrose)
Table sugar is a disaccharide - the yeast needs to break it down into glucose and fructose with an enzyme called invertase before it can use it. That extra step means sugar doesn't produce an instant burst of activity, but it does give the yeast a readily available food source that supplements the slower starch-to-sugar conversion.
At levels up to about 5% of flour weight, sugar speeds up fermentation slightly and provides extra fuel for browning. Above 5%, it starts to inhibit yeast through osmotic pressure - the high sugar concentration draws water away from the yeast cells, stressing them.
For most pizza styles, 0% to 2% sugar is the range. Neapolitan purists use none at all. New York style runs 2%, which is on the higher end. Styles like Detroit (1%) and Sicilian (0.5%) actually use less than you might expect for pan pizzas. Chicago deep dish is the exception at 1.5%, paired with a very high fat content.
Diastatic Malt Powder
This is one of the more underappreciated ingredients in pizza dough, and it's especially valuable for long ferments.
Diastatic malt powder contains active beta-amylase enzymes - the same type of enzymes naturally present in flour, but in much higher concentration. These enzymes continuously break down starch into maltose throughout the entire proofing period. The effect is twofold:
- Sustained yeast food. During a 48-72 hour cold ferment, the yeast can exhaust the naturally available sugars. Diastatic malt keeps the supply going, preventing yeast stalling.
- Better browning. The maltose that the yeast doesn't consume participates in the Maillard reaction during baking. If you've ever had a cold-fermented dough come out pale despite a long ferment, this is probably why - the yeast ate all the available sugar. A small amount of diastatic malt (0.5% to 1% of flour weight) solves that problem.
Non-diastatic malt powder, by contrast, has had its enzymes deactivated. It adds flavor and some browning, but it doesn't provide the sustained enzymatic activity that makes diastatic malt valuable for long ferments. Make sure you're buying the right one.
Honey
Honey is high in fructose and brings its own flavor. It's hygroscopic (attracts and holds moisture), which can affect both crumb texture and shelf life. Some bakers love it in pan pizza doughs. For very long cold ferments, honey's acidity can potentially accelerate gluten breakdown, so it's better suited to same-day or overnight doughs.
Oil and Fat
Oil doesn't directly affect fermentation much, but it changes the dough's texture and how it proofs. Fat coats gluten strands and makes the network more extensible, which can lead to a slightly more tender crumb. It also slows moisture loss during proofing. Most pizza styles use 1-3% oil relative to flour weight - Neapolitan and Canotto use none at all, while Chicago deep dish is a major outlier at 18%, which is part of what gives it that distinctly rich, almost pastry-like crust.
Your Proofing Environment: Containers, Covering, and Skin Prevention
The physical setup matters more than most people realize. Poor environmental control is behind a lot of proofing failures, and it's easy to fix.
Cover Your Dough (Properly)
The number one environmental enemy during proofing is dehydration. When the surface of a dough ball dries out, it forms a leathery skin that can't stretch. That skin acts as a physical barrier - the interior keeps expanding, but the exterior can't keep up. The result is a dough ball with cracks, tears, and uneven rise.
What works:
- Airtight lids on dough trays or containers. This is the best option. It traps humidity right at the surface of the dough. Stackable dough trays with lids (the kind pizzerias use) are worth the investment if you make pizza regularly.
- Plastic wrap pressed directly onto the dough. Effective but wasteful. It works.
- Reusable silicone lids or beeswax wraps. Fine for room temperature proofing.
What doesn't work well:
- Damp towels. This is the most commonly recommended option and one of the worst. Towels are porous - moisture escapes right through them. They also cool the dough through evaporation, which slows your proof. If a towel is all you have, it's better than nothing, but it's not good.
- Leaving dough uncovered. Don't do this. Even 20 minutes of exposure in a dry kitchen (and Colorado kitchens are very dry) can start forming a skin.
Oil vs. Flour in the Container
You need something between the dough and the container to prevent sticking. Both oil and flour work, but they're suited to different situations.
Oil is generally the better choice for most pizza dough, especially for cold fermentation. A thin coating of olive oil (or any neutral oil) creates a moisture-proof barrier on the dough surface, provides additional protection against drying, and lets the dough slide out cleanly without disrupting the bubble structure. This matters - you spent hours building those gas cells, and ripping the dough out of a dry container can destroy them.
Flour works better for very stiff, low-hydration doughs where oil might interfere with shaping. The downside is that excess flour can absorb into the dough over time, changing the hydration and potentially leaving a raw, powdery taste on the crust.
For most home pizza makers doing cold ferments at 60-70% hydration, oil is the way to go.
How to Tell When Your Dough Is Ready
This is the question everyone wants a simple answer to, and the honest answer is that it depends on what you're looking for. But there are reliable indicators.
The Poke Test
The poke test is the single most useful diagnostic tool for assessing dough maturity, and it's exactly what it sounds like.
Flour your finger and press it gently about half an inch (1 cm) into the surface of a dough ball. Watch what happens:
If the dough springs back quickly and completely - it's underproofed. The gluten is still too tight and elastic. Give it more time. If you tried to stretch this dough into a pizza, it would fight you and snap back.
If the dough springs back slowly and partially, leaving a slight dimple - it's ready. The gluten has relaxed enough to stretch easily, but it still has enough structural integrity to hold its shape and trap gas. This is the sweet spot.
If the indentation stays put, or the dough deflates around it - it's overproofed. The gluten network has been stretched past its breaking point. See the troubleshooting section below.
Visual Cues
Beyond the poke test, look for:
- Volume. A well-proofed dough ball has typically expanded to 1.5 to 2 times its balled size. For cold-fermented dough, this might happen in the fridge or during the room temperature tempering period (or a combination of both).
- Surface appearance. The surface should look smooth, slightly domed, and "pillowy." You might see small bubbles just beneath the surface. That's a good sign.
- Pancaking. If a dough ball is flattening out and spreading sideways instead of staying domed, it's losing structural tension. Use it soon or re-ball it (more on that below).
The "Jiggle Factor"
This one's harder to describe in writing, but experienced pizza makers know it instantly. Give the dough tray a gentle shake. Well-proofed dough balls jiggle slightly, like a water balloon. Underproofed dough barely moves. Overproofed dough wobbles loosely and looks deflated.
Troubleshooting: Over-Proofed and Under-Proofed Dough
Things go wrong. That's fine. Here's how to handle it.
Over-Proofed Dough (And How to Rescue It)
Over-proofing happens when the yeast has been working too long. The CO2 has expanded the gluten network past its limits, and the dough loses its ability to hold structure. Visually, the dough flattens out, feels slack and sticky, and the poke test indentation stays permanently.
The fix: re-balling.
This works more often than you'd expect. The idea is to reset the dough's structural clock:
- Gently tip the dough out of its container onto a lightly floured surface. Use a scraper if needed - the dough is fragile, so be careful.
- Gently press the dough to release the excess gas. Don't punch it or knead it aggressively - you just want to deflate the largest bubbles.
- Fold the dough over itself several times, tucking the edges underneath, until you've rebuilt a smooth, taut surface. Basically, you're balling it again from scratch.
- Put it back in an oiled container and let it proof again at room temperature for 2 to 4 hours.
The re-balled dough will rise again as the yeast restarts gas production. The crust may turn out slightly different from optimal - possibly a bit more bread-like in flavor, possibly darker due to extended fermentation - but it's a perfectly usable pizza. Way better than throwing it out.
When it's too far gone: if the dough smells strongly of alcohol, has turned gray, feels slimy, or tears apart with no resistance, it's past the point of recovery. At that point you're looking at spoilage, not just overproofing. The post on whether pizza dough can go bad covers the specific signs to look for.
Under-Proofed Dough
Under-proofing is less dramatic but still produces poor results. The dough will be tight and elastic, difficult to stretch, and the finished crust will be dense with a tight, gummy crumb. If you're consistently running into this problem, the troubleshooting guide on dough not rising walks through every common cause and fix.
The fix: give it more time. Seriously, that's it. If you're in a rush, move the dough somewhere warmer (the oven method described above works well). If the dough balls keep snapping back when you try to stretch them, let them rest 20-30 more minutes and try again.
If you consistently find your dough is underproofed at the time you want to bake, your options are: use more yeast, proof at a warmer temperature, or plan for a longer proofing window. The calculator is the easiest way to dial this in.
Practical Proofing Schedules
Theory is useful, but what most people want is a concrete timeline they can plan around. Here are a few common scenarios.
Same-Day Pizza (Friday afternoon to Friday evening)
- 2:00 PM: Mix and knead dough. Use around 0.12% IDY (that's roughly 1/4 teaspoon for 4 dough balls - less than you'd think).
- 2:00-4:00 PM: Bulk ferment at room temperature. Dough should increase 50-70% in volume.
- 4:00 PM: Divide and ball. Place in oiled containers, covered.
- 4:00-6:00 PM: Ball proof at room temperature.
- 6:00 PM: Preheat your oven (with your stone or steel inside) and start stretching.
Overnight Cold Ferment (Evening to next day)
- 8:00 PM: Mix and knead dough. Use around 0.2% IDY (roughly 1/2 teaspoon for 4 balls).
- 8:00-9:00 PM: Rest at room temperature for 1 hour.
- 9:00 PM: Divide, ball, and place in oiled containers in the fridge.
- Next day, 3:00-4:00 PM: Remove from fridge. Let dough balls temper at room temperature for 1.5-2 hours.
- 5:00-5:30 PM: Preheat oven and start baking.
Multi-Day Cold Ferment (Thursday to Saturday)
- Thursday 8:00 PM: Mix and knead dough. Use around 0.14% IDY (roughly 1/4 teaspoon for 4 balls - less than a 24-hour dough because the extended time compensates).
- Thursday 8:30 PM: Brief room temperature rest (30-60 minutes), then ball and refrigerate.
- Saturday 3:00-4:00 PM: Remove from fridge. Balls should be slightly puffed and pillowy.
- Saturday 5:00-6:00 PM: Tempered, proofed, ready to stretch and bake.
The multi-day schedule is the most forgiving. If Saturday doesn't work out, Sunday probably will too. That flexibility is one of the best things about cold fermentation.
The Role of Salt in Proofing
Salt deserves a mention here because it has a direct effect on fermentation rate. Salt creates osmotic pressure that draws water away from yeast cells, slowing their metabolism. In practical terms, a dough with 3% salt will ferment noticeably slower than an identical dough with 2% salt.
This is one reason you should be precise with salt. Under-salting doesn't just produce bland pizza - it also speeds up fermentation, which can throw off your timing. Most pizza dough falls in the 2.5% to 3% range (as a baker's percentage of flour weight). The PizzaLogic calculator lets you adjust salt percentage and accounts for its effect on fermentation timing.
Some recipes call for adding salt after an initial autolyse period. Holding salt back during autolyse lets the flour hydrate more freely and allows enzymes to work without the inhibiting effect of salt. It's a small optimization, but it adds up - especially for same-day doughs where every bit of enzymatic activity counts.
Altitude and Climate Considerations
If you bake above 3,000 feet - and if you're reading this from anywhere along Colorado's Front Range, you do - proofing behaves differently.
At higher altitude, atmospheric pressure is lower, which means CO2 bubbles in the dough expand more easily. This sounds like a good thing, but it means dough tends to overproof faster than it would at sea level. The yeast isn't actually more active, but the gas it produces takes up more space.
The standard adjustment is to reduce yeast by about 15-20% compared to sea-level recipes. You might also find that cold fermentation is even more forgiving at altitude, since the cold temperature counteracts the faster gas expansion.
Dry climates (also very relevant in Colorado) mean your dough loses moisture faster. Covering your dough properly is critical - and you might benefit from bumping hydration up by 1-2% compared to what a recipe written for a humid coastal kitchen recommends.
Food Safety During Long Proofs
For standard lean pizza dough (flour, water, salt, yeast, maybe a little oil and sugar), food safety during cold fermentation is straightforward. The salt content and the organic acids produced by fermentation create an environment that's naturally inhospitable to most harmful bacteria. Lean doughs are safe in the fridge for 3 to 5 days without concern.
Enriched doughs are a different story. If your recipe includes eggs, milk, butter, or cream, those ingredients provide nutrients that can support bacterial growth - including pathogens like Staphylococcus aureus. Enriched doughs should never sit at room temperature for more than 2-4 hours total. If you want a long proof with an enriched dough, it must be cold the entire time, and even then, limit it to 48 hours max.
Very long proofs (96+ hours): Even with lean dough, extending past 4 days starts pushing into problematic territory. The accumulating acids can drop the pH low enough to trigger proteolysis - the enzymatic breakdown of the gluten proteins themselves. When this happens, the dough turns soupy and impossible to handle. Most professional guidelines cap cold fermentation at 5 days. For practical purposes, the 24-72 hour window is the sweet spot.
The guide on whether pizza dough can go bad covers the specific spoilage signs to watch for if you're unsure about a dough that's been in the fridge for a while.
Using Preferments to Enhance Proofing
If you want to push flavor even further without an extremely long cold ferment, preferments are worth exploring. A pre-ferment is essentially a small batch of dough (or batter) that you ferment separately before mixing it into your final dough.
The two most common preferments for pizza are poolish (equal parts flour and water by weight, very loose and batter-like) and biga (lower hydration, stiffer, more like a dough). Both develop flavor compounds and organic acids during their separate fermentation that then get folded into your main dough, giving you a head start on complexity.
A dough made with a poolish that was fermented overnight, then cold-fermented as a final dough for 24-48 hours, will typically outperform a straight dough cold-fermented for the same total time. The preferment front-loads flavor development, and the cold ferment adds its own.
FAQ
How do you proof pizza dough? Mix your dough, knead it until smooth, then let it rest in a covered, oiled container at your chosen temperature until it's roughly doubled in size and passes the poke test (a light press leaves a dimple that slowly springs back partway). For detailed steps, start with the temperature section above.
How long should pizza dough proof? It depends entirely on temperature and yeast amount. At room temperature (70-75 degrees F), expect 1.5 to 4 hours. In a warm oven (85-100 degrees F), as little as 30-60 minutes. In the fridge (35-41 degrees F), 24 to 72 hours. The calculator can give you a precise yeast amount for any target time.
How long to proof pizza dough in the oven? With the oven light on or a pan of hot water on the bottom rack (creating about 85-100 degrees F inside), most doughs proof in 30 to 60 minutes. Check at 30 minutes using the poke test.
What temperature to proof pizza dough? There's no single "right" temperature. Room temperature (68-75 degrees F) is the standard default. For faster proofing, 85-100 degrees F. For better flavor and more scheduling flexibility, 35-41 degrees F (your fridge). Each temperature requires a different yeast amount and produces different results.
How long can you proof pizza dough? At room temperature, most doughs are past their peak after 4-6 hours (depending on yeast amount and kitchen temp). In the fridge, a lean dough can proof for up to 5 days, though 24-72 hours is the practical sweet spot. Beyond that, acid buildup starts degrading the gluten structure.
Can you proof pizza dough overnight at room temperature? Technically yes, but it requires very little yeast and a cool room (below 68 degrees F ideally). In most kitchens, overnight at room temperature with a standard yeast amount will overproof the dough. Cold fermentation in the fridge is a far safer and more reliable option for overnight proofing.
My dough didn't rise - what happened? The most common causes: dead yeast (check the expiration date and test it in warm water with a pinch of sugar - it should foam within 10 minutes), water that was too hot when mixed (above 120 degrees F kills yeast), too much salt, or the environment was too cold. If you used instant yeast and mixed it directly into very cold flour and water, it might just need more time. For a full diagnosis, see the guide to fixing dough that won't rise.
Ready to plan your next dough? The PizzaLogic Dough Calculator generates precise ingredient amounts - including temperature-adjusted yeast calculations - for any proofing schedule, pizza style, and number of pies.