If you have ever bitten into a slice with a crust that is impossibly light, covered in charred blisters, and has this deep, almost nutty sweetness to it - that is probably poolish at work. A poolish is one of the simplest upgrades you can make to your home pizza, and once you try it, standard direct doughs start to feel one-dimensional.
It fits naturally into a weekday schedule, it is practically foolproof once you understand the basics, and the results are dramatic. This guide covers everything you need to know - the science behind it, exact formulas, timing schedules, and the troubleshooting details that most recipes skip over.
If you are brand new to the concept of pre-ferments, I wrote a full breakdown of what a preferment is and why it matters for pizza dough that covers the big picture. This post goes deep on poolish specifically.
What Is a Poolish?
A poolish is a pre-ferment - a portion of your dough's flour and water that you mix with a small amount of yeast and let ferment for several hours before building your final dough. What makes a poolish distinct from other pre-ferments is its hydration: it uses equal parts flour and water by weight (100% hydration), which gives it a loose, batter-like consistency.
The name comes from Poland, where the technique originated before French bakers adopted it in the 19th century to improve the flavor and texture of their breads. It has been a staple in artisan baking ever since, and it translates beautifully to pizza.
If you have read my guide on how to make biga for pizza dough, you already know the other major Italian pre-ferment. The key difference is hydration: biga is a stiff, dough-like pre-ferment (50-60% hydration), while poolish is a wet, pourable batter (100% hydration). That single difference changes everything about how they behave, what they contribute to the final dough, and how you work with them.
Poolish vs. Biga vs. Direct Dough
Understanding where poolish fits among your options helps you choose the right method for a given bake.
| Direct Dough | Poolish | Biga | |
|---|---|---|---|
| Hydration | N/A (no pre-ferment) | 100% (equal flour and water) | 50-60% (stiff dough) |
| Fermentation Time | 1-24 hours total | 8-18 hours for preferment + final proof | 12-24 hours for preferment + final proof |
| Flavor Profile | Clean, wheaty, simple | Complex, sweet, slightly nutty | Mildly tangy, wheaty, aromatic |
| Crust Texture | Chewier, more uniform crumb | Light, airy, crispy with irregular holes | Chewy with moderate openness |
| Extensibility | Moderate | Very high - easy to stretch thin | Moderate to high |
| Hands-on Effort | Lowest | Low (5 min to mix poolish) | Low-moderate (needs brief kneading) |
| Best For | Same-day pizza, beginners | Neapolitan-style, NY-style, any style where you want maximum lightness | Roman-style, styles that benefit from more structure |
Poolish tends to produce the most open, irregular crumb structure of the three options. If you are chasing blistered, airy, light pizza crust, poolish is probably your best path.
Why Poolish Makes Better Pizza Dough
It is worth understanding what is actually happening during those hours of fermentation, because it explains why the results are so different from a direct dough.
Flavor Development
When yeast ferments flour over an extended period, it produces far more than just carbon dioxide. The slow fermentation generates ethanol, organic acids, and a range of aromatic compounds - esters and aldehydes - that simply do not develop during a short, fast rise. This is why poolish dough has that complex, slightly sweet, almost nutty flavor that is impossible to replicate with a direct dough, no matter how long you cold-ferment it.
Beyond the yeast activity, enzymes in the flour (primarily amylase) are slowly breaking down starches into simple sugars the entire time the poolish sits. These sugars contribute sweetness to the flavor and also play a critical role in browning during baking - they caramelize and participate in the Maillard reaction, which is where those dark blisters and deep golden color come from.
Texture and Structure
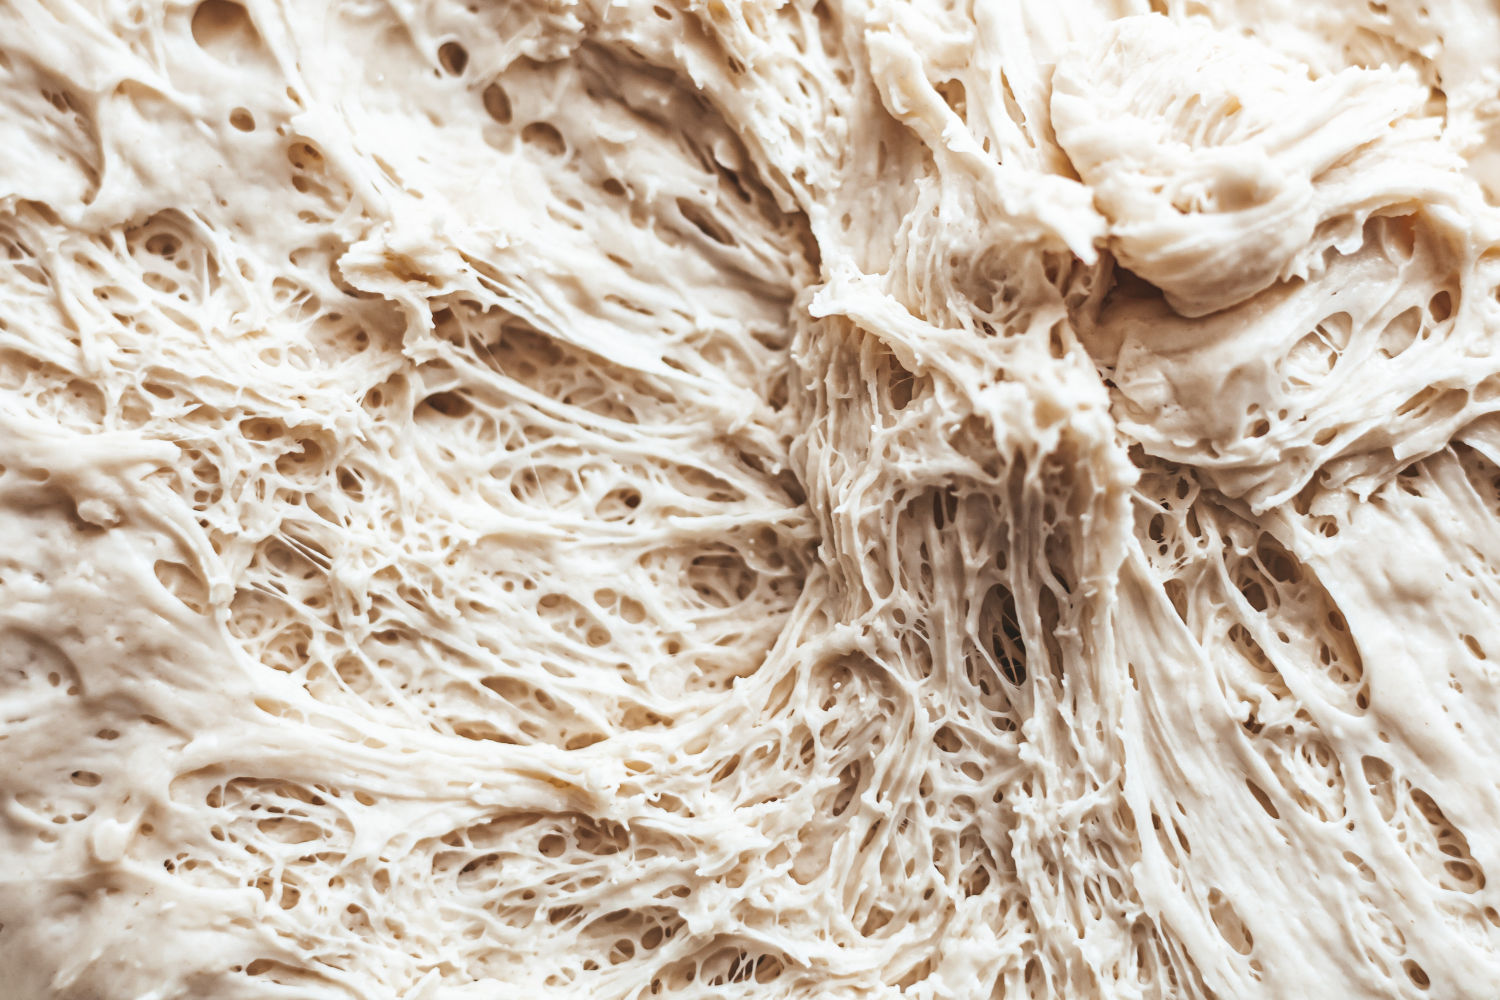
The extended fermentation at high hydration has a profound effect on gluten. During those hours, enzymes called proteases gently break down some of the gluten proteins. This is controlled weakening - it makes the dough more extensible without destroying its ability to hold gas. The practical result is dough that stretches easily, holds its shape, and bakes into a crust with an open, irregular crumb full of large and small air pockets.
The high water content in the poolish also means your final dough absorbs water more efficiently when you mix everything together. Pre-hydrated flour integrates smoothly, and the fermented portion of the dough acts almost like a natural dough conditioner.
Better Browning and Shelf Life
Those extra sugars created by enzymatic activity during the long ferment serve double duty. They improve crust color and browning during baking, and they also help the baked crust retain moisture longer. A poolish pizza crust stays pleasantly crisp on the outside while remaining tender inside, even as it cools - something direct doughs struggle with.
The Poolish Formula
Making poolish is dead simple. It is a 1:1 ratio of flour to water by weight, plus a tiny amount of yeast. The yeast quantity is the only variable, and it controls how fast the poolish matures.
The tricky part is not the poolish itself - it is splitting your total flour, water, and yeast correctly between the poolish and the final dough. The PizzaLogic poolish dough calculator handles all of that math for you. Just select poolish as your preferment type, dial in your number of dough balls and target hydration, and it generates the exact ingredient split, fermentation schedule, and step-by-step instructions. It is the easiest way to get a precise, repeatable recipe without doing baker's math by hand.
Here is an example recipe generated by the calculator for four dough balls at 70% hydration, using a 14-hour overnight poolish and a cold-fermented final dough. This example uses the split-yeast method (more on that below) - a small amount of yeast goes in the poolish for its own fermentation window, and a separately calculated amount goes in the final dough for the cold ferment.
Poolish
- Flour: 188g
- Water: 188g (room temperature)
- Yeast: 0.15g instant dry yeast (a tiny pinch)
Mix, cover, and ferment at room temperature for about 14 hours until bubbly and slightly domed.
Final Dough
- Additional flour: 440g
- Additional water: 252g
- Salt: 16g
- Additional yeast: 0.50g instant dry yeast
Fermentation Schedule
- Bulk rise: 3 hours at room temperature (~70°F / 21°C), with 2-4 stretch-and-folds during the first 1-2 hours
- Cold ferment: 24 hours at 40°F / 4°C (refrigerated, in individual containers after dividing and balling)
- Warm-up before baking: 2-3 hours at room temperature
Full Recipe Totals
| Ingredient | Weight | Baker's % |
|---|---|---|
| Total flour | 628g | 100% |
| Total water | 440g | 70% |
| Salt | 16g | 2.5% |
| Total yeast | 0.65g | 0.10% |
Yield: 4 dough balls at ~271g each
The poolish accounts for about 30% of the total flour, which is a solid default. You can adjust this up or down in the calculator - more pre-fermented flour means more flavor complexity but a weaker gluten network, while less gives a subtler effect. Staying in the 20-40% range works well for most pizza styles.
Choosing Your Flour
You can make poolish with almost any wheat flour, but the choice matters. For a deep dive on this topic, check out the full guide on the best flour for pizza dough. Here is a quick summary of how each type performs in a poolish:
Bread flour (12-14% protein) is the default choice for poolish. The higher protein content compensates for the gluten-weakening that happens during the long ferment, so your final dough still has plenty of structure. King Arthur Bread Flour is a reliable option.
Tipo 00 flour works great if you are going for a more Neapolitan-style result. Something like Caputo Pizzeria (which is actually a strong 00 at around 12.5% protein) holds up well in a poolish. Avoid the weaker 00 flours labeled for pasta - they do not have enough protein to survive the extended fermentation without becoming slack.
All-purpose flour is fine in a pinch, but the lower protein (10-11%) means your final dough may be slightly less extensible and the crumb less open. If AP is all you have, consider reducing the poolish fermentation time by an hour or two to limit gluten breakdown.
Whole wheat flour is not recommended for the poolish itself. The bran particles cut through gluten strands and the higher enzyme activity can make the poolish degrade quickly. If you want whole wheat in your pizza, add it to the final dough instead.
Adjusting Yeast for Different Timelines
The amount of yeast you use determines how long the poolish takes to mature. This is the key lever for fitting poolish into your schedule.
| Yeast Amount (per 300g flour) | Approximate Maturation Time at 70°F (21°C) |
|---|---|
| 0.1g (barely a pinch) | 16-18 hours |
| 0.3g (small pinch) | 12-14 hours |
| 0.5g (moderate pinch) | 8-10 hours |
| 1.0g (generous pinch) | 6-8 hours |
These are ballpark figures. Temperature has a huge effect, which I cover below. But the principle is straightforward: less yeast = slower, more complex fermentation. More yeast = faster, slightly less complex but still far better than a direct dough.
The 0.3g range is ideal for an overnight poolish. Mix it before bed, and it is ready by late morning.
Two Approaches to Yeast in Poolish Dough
There is a question that comes up constantly in pizza forums and baking communities, and most guides gloss over it: once your poolish is mature, do you add more yeast to the final dough?
The answer depends on which of two fundamentally different approaches you are using. The pizza community practices both but has never clearly named or distinguished them, which leads to a lot of confused forum threads and contradictory advice. Here is the actual distinction.
Poolish-leavened (all yeast in the poolish). In this approach, the poolish is your sole leavening agent. All of the yeast goes into the poolish, and the final dough gets zero additional yeast. The idea is simple - during those 8-14 hours of fermentation, the small amount of yeast you started with multiplies dramatically. By the time the poolish is mature, you have a large, active colony that is more than capable of raising the final dough on its own.
This is the traditional French baking approach and the method that most experienced poolish bakers gravitate toward. Total yeast is dramatically lower than a direct dough - often 60-70% less - because you are leveraging hours of biological multiplication rather than brute-forcing the rise with a large upfront dose. The result tends to be a more complex flavor, since less commercial yeast means less competition for the sugars that drive browning and caramelization.
This method works best when your final dough will proof at room temperature for several hours before baking. The active colony from the poolish handles the rise, and the extended proof continues building flavor.
Split method (independent yeast in poolish and final dough). In this approach, the poolish gets a small amount of yeast calculated for its own fermentation window, and the final dough gets a separately calculated amount based on its own fermentation schedule. The poolish contributes flavor, texture, and extensibility, but it is not expected to be the primary leavening agent for the final dough.
This approach makes the most sense when you are cold fermenting the final dough. Fridge temperatures (38-40°F) suppress yeast activity to roughly 5% of room temperature speed. The mature colony coming in from the poolish, while active, may not be enough to sustain a 24-48 hour cold ferment on its own. The additional yeast in the final dough is calculated specifically for those cold conditions and that timeline.
With the split method, total yeast ends up close to what a direct dough would use for the same fermentation schedule. The poolish yeast amount is small relative to the final dough yeast - typically around 10-20% of the total.
Which should you use? It comes down to your fermentation plan for the final dough:
- Room temperature proof only (3-8 hours): Use poolish-leavened. The mature poolish colony handles the rise, and you use significantly less total yeast.
- Cold ferment (24-72 hours): Use the split method. The final dough needs its own yeast to sustain activity through the long, cold fermentation.
The PizzaLogic poolish calculator handles this automatically - it selects the appropriate method based on your fermentation inputs and shows you exactly how the yeast is distributed. You can also override the selection manually if you prefer a specific approach.
Here is what the difference looks like in practice, using the same base recipe (4 dough balls, 70% hydration, 30% poolish at 14 hours):
| Poolish-Leavened | Split Method | |
|---|---|---|
| Final dough fermentation | 6 hours at room temp | 2h room temp + 22h cold ferment |
| Poolish yeast | 0.17g | 0.17g |
| Final dough yeast | None | 0.88g |
| Total yeast | 0.17g | 1.05g |
| vs. equivalent direct dough | ~70% less yeast | Similar total yeast |
The poolish yeast is the same in both cases because it is sized for the poolish's own 14-hour fermentation - that does not change regardless of what happens to the final dough afterward. The difference is entirely in whether the final dough gets its own yeast for its own schedule.
Water Temperature Matters
Room temperature water (65-70°F / 18-21°C) is the standard recommendation, but you can use water temperature to fine-tune your timeline:
- Cooler water (60-65°F / 15-18°C): Slows fermentation. Useful in warm kitchens or if you want to stretch the timeline a few extra hours.
- Warmer water (72-78°F / 22-25°C): Speeds things up. Helpful if your kitchen is cold or you need the poolish ready sooner.
Avoid water above 80°F (27°C). It accelerates fermentation too aggressively and can produce off-flavors.
How to Make a Poolish for Pizza: Step by Step
The actual process takes under five minutes. Here is how it works.
Step 1: Dissolve the Yeast
Pour your room temperature water into a clean jar, tall container, or medium mixing bowl. Add the yeast and give it a brief stir. Instant yeast dissolves almost immediately. If you are using active dry yeast, let it sit for a couple of minutes until it starts to look creamy on the surface.
A tall, straight-sided container (like a large deli container or a 2-quart mason jar) works best because it makes it easy to gauge how much the poolish has risen. A piece of tape on the outside marking the starting level helps you track the progress.
Step 2: Add the Flour
Dump all of the flour into the water at once. No need to add it gradually.
Step 3: Mix Until Homogeneous
Stir with a sturdy spoon, spatula, or dough whisk until there are no dry pockets of flour remaining. This takes 30-60 seconds. The consistency should look like thick pancake batter - shaggy, sticky, and pourable with some effort. It will not be smooth, and that is fine.
Do not overmix or try to develop gluten at this stage. You are just hydrating the flour.
Step 4: Cover Loosely
Place a lid on the container, slightly ajar, or drape plastic wrap over the top without sealing it tight. The fermentation gases need to escape. A tightly sealed container can build enough pressure to pop its lid off - something you definitely do not want to discover at 2 AM.
Step 5: Ferment at Room Temperature
Leave the container on your counter at room temperature. Do not put it in the oven, on top of the fridge, or anywhere warm. Slow, steady fermentation at ambient temperature is what produces the best flavor.
Set a mental note (or an actual timer) for when you expect it to be ready based on your yeast amount and kitchen temperature.
How to Tell When Your Poolish Is Ready
This is the most important skill in working with poolish, and it is where most guides fall short. Timing alone is not reliable - you need to read the visual cues.
The Four Signs of Peak Maturity
1. Volume increase: The poolish should have at least doubled, and more likely tripled, from its starting level. This is why that tape mark on the container is useful.
2. Surface covered in bubbles: The top should be completely dotted with bubbles of varying sizes - some large, some small. The surface should look almost foamy or lacy.
3. The dome is starting to flatten: As the poolish ferments, the top surface rises into a slight dome. When the yeast has consumed most of the available sugars, that dome begins to flatten or even recede slightly at the center. This is the sweet spot. A high, active dome means it is still going. A completely collapsed, concave surface means it has gone past peak.
4. Aroma: At peak maturity, poolish smells pleasantly yeasty and slightly sweet, with mild alcoholic notes. It should not smell aggressively sour or like nail polish remover (acetone). A mild tanginess is fine. A sharp sourness means it has over-fermented.
The Window of Readiness
Poolish does not go from "not ready" to "past its prime" in an instant. There is a usable window of roughly 1-2 hours around peak maturity where it will still make excellent dough. Do not stress about hitting the exact minute.
That said, catching it on the rise (dome still slightly high but covered in bubbles) tends to produce a final dough with slightly more rising power than catching it after the dome has fully collapsed.
What If You Miss the Window?
If life gets in the way and your poolish has clearly over-fermented - collapsed surface, strong sour smell, watery liquid (hooch) on top - you have a few options:
- Slightly past peak: Use it. The dough will still be dramatically better than a direct dough. You might notice a faintly more acidic flavor, but most people would not pick up on it.
- Significantly over-fermented (6+ hours past peak): The poolish has lost most of its rising power. You can still use it, but increase the yeast in your final dough by 50-100% to compensate for the weakened pre-ferment.
- Smells strongly of acetone or is extremely watery: Discard it and start over. Flour and a pinch of yeast are cheap. Your time and the rest of your ingredients are not.
The Refrigerator Trick
If your poolish is approaching peak maturity but you are not ready to mix your final dough, move it to the refrigerator. The cold temperature dramatically slows fermentation and buys you an additional 8-12 hours. Pull it out about 1-2 hours before you plan to use it so it can warm up slightly and reactivate.
This is a great trick when the poolish is ready at 10 AM but you do not plan to bake until the evening.
Making the Final Poolish Pizza Dough
Once your poolish is mature, it is time to build the complete dough. The poolish provides a portion of your total flour and water, and you add the remainder along with salt and a small amount of additional yeast. If you used the PizzaLogic poolish calculator, your exact ingredient split is already figured out. The process below follows the 70% hydration recipe from the formula section above, but the method is the same regardless of your specific numbers.
Adjusting Hydration
70% is a great target for poolish pizza dough - it produces a light, airy crumb with excellent blistering. But it does make for a wet, sticky dough that takes some practice to handle.
If you are newer to pizza making or want something a bit more manageable, drop the hydration to 65% in the calculator. The crust will be slightly chewier and denser, but still dramatically better than a direct dough. You can always work your way up as you get comfortable.
Going above 70% (up to 75% or even 80%) is possible and produces incredibly open, delicate crusts, but the dough handling becomes significantly more challenging. The high hydration dough guide covers techniques for working with very wet doughs.
Mixing the Final Dough
1. Dissolve the poolish in water. Pour your additional water into a large bowl. The calculator recipe calls for water at about 92°F (33°C) - this warmer temperature compensates for the cool poolish and brings the overall dough to a good working temperature. Add the mature poolish and use your hands or a spoon to break it up and dissolve it into the water. It does not need to be perfectly smooth - just well dispersed. This step makes a massive difference in how easily the dough comes together. If you dump flour onto the sticky poolish directly, you end up fighting dry pockets for ten minutes.
2. Add flour and mix. Add your remaining flour and the additional yeast. Mix by hand until no dry flour remains. The dough will look shaggy and rough - that is exactly what you want at this point.
3. Autolyse. Let the dough rest, covered, for 20 minutes. During this time the flour fully hydrates and gluten begins developing on its own without any kneading. This step makes a big difference in the final dough texture, especially at higher hydrations. It is tempting to skip, but it is worth the wait.
4. Add salt and mix. Sprinkle the salt over the dough and work it in by hand for 3-4 minutes until it is fully incorporated and the dough starts to feel more cohesive. Some people prefer to add salt before the autolyse - either approach works, but holding it back lets the flour hydrate more freely during the rest.
5. Bulk ferment with stretch and folds. Cover the bowl and let the dough rise at room temperature for about 2 hours. During the first hour, perform 2-4 sets of stretch and folds spaced about 30 minutes apart. To stretch and fold: with wet hands, grab one side of the dough, stretch it upward, and fold it over the center. Rotate the bowl 90 degrees and repeat. Do this four times (one full rotation) per set.
Stretch and folds build gluten strength gently without the aggressive mechanical action of kneading, which suits poolish doughs well. The pre-fermented flour has already undergone some gluten breakdown, so a lighter touch preserves more of the open, airy structure you are after. By the end of the bulk ferment, the dough should feel noticeably smoother and stronger, and should have increased in volume by roughly 50%.
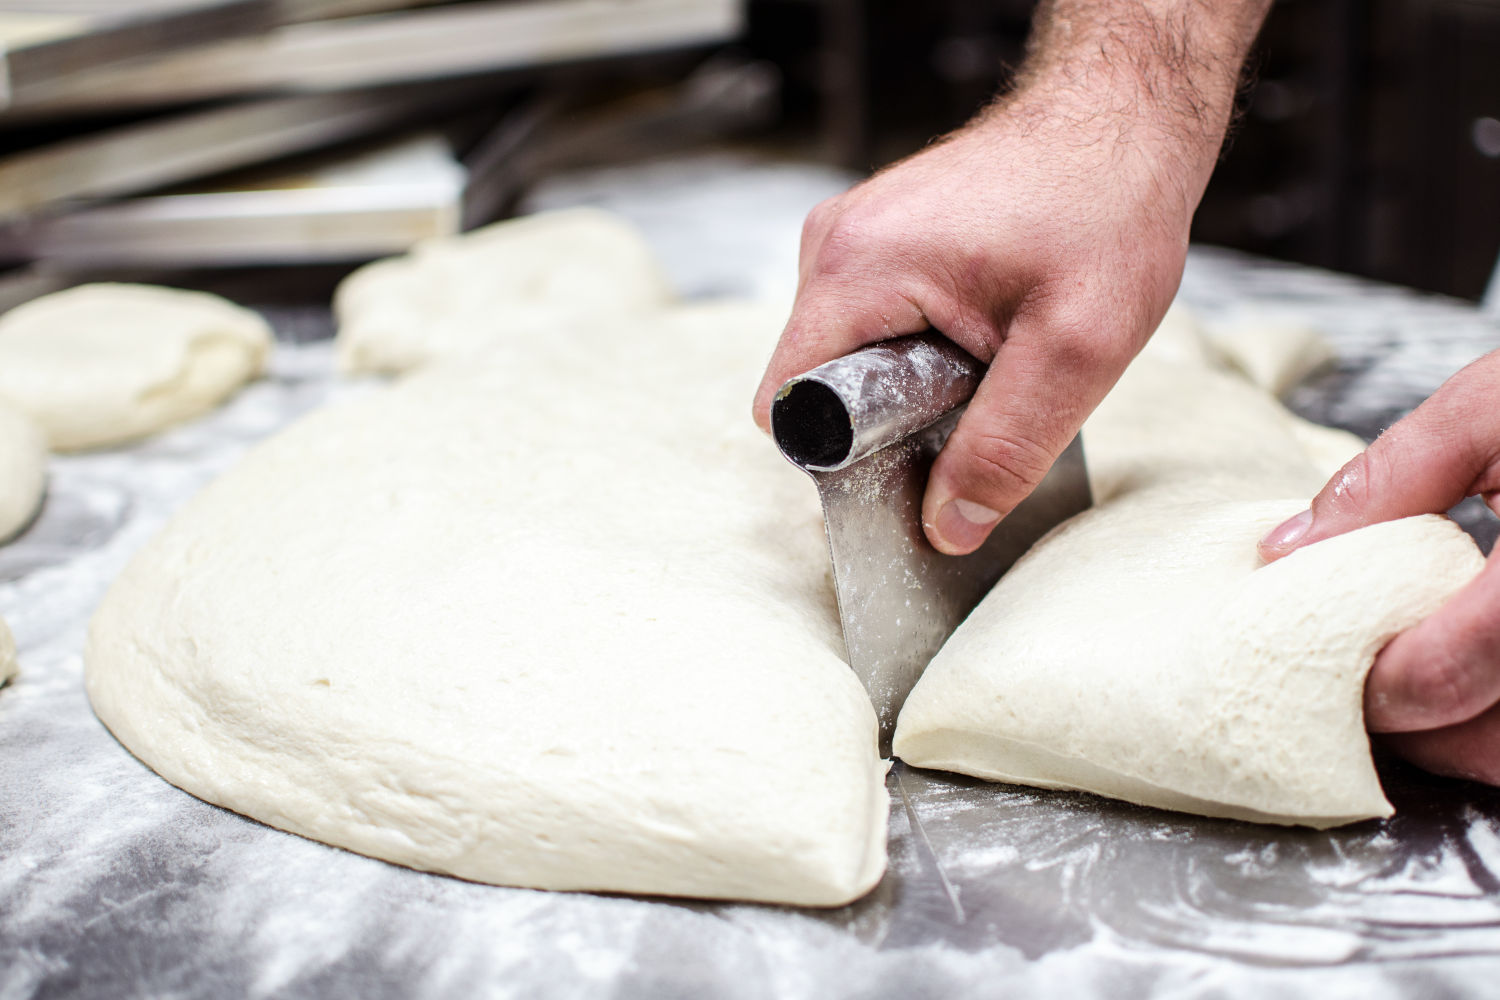
6. Divide and ball. Turn the dough out onto a lightly floured surface. Divide into portions (the calculator recipe yields four balls at about 271g each). Shape each portion into a tight ball by tucking the edges underneath and using the friction of the counter to build surface tension. A bench scraper helps here. Use a kitchen scale for accuracy - consistent ball sizes mean consistent pizzas.
7. Final proof. Place the dough balls in individual lightly oiled containers or on a lightly oiled tray, covered tightly. From here you have two options:
- Same-day bake: Let the balls proof at room temperature for 2-4 hours, then shape and bake.
- Cold ferment (recommended): Place them straight into the refrigerator for 24-72 hours. This is where poolish dough really hits its stride - the combination of pre-ferment flavor with a slow cold proof produces the most complex, deeply flavored crust.
A Note on the Additional Yeast
Whether your final dough includes additional yeast depends on which poolish method you are using. If you read the section above on the two approaches to yeast in poolish dough, you already know the reasoning: poolish-leavened recipes skip the extra yeast because the mature poolish colony handles the rise, while split-method recipes include independently calculated yeast for the final dough's own fermentation schedule.
The PizzaLogic poolish calculator selects the right approach automatically based on your fermentation inputs and shows you exactly how the yeast is distributed between the poolish and the final dough.
Cold Fermenting Poolish Pizza Dough
Cold fermenting - letting your shaped dough balls ferment slowly in the refrigerator - is where poolish pizza dough really reaches its peak. The combination of the pre-ferment's flavor development with an additional cold ferment produces incredibly complex, deeply flavored crust.
How to Cold Ferment
After dividing and balling, place your dough balls in individual sealed containers (round deli containers with lids work great, lightly oiled) and put them straight into the refrigerator.
- Minimum cold ferment: 24 hours
- Sweet spot: 48 hours
- Maximum: 72 hours (beyond this, the dough may over-proof and lose structure)
Before Baking
Pull the dough balls from the fridge 1-2 hours before you plan to bake, depending on your kitchen temperature. You want the dough to relax and come closer to room temperature so it stretches easily. Cold dough fights back and springs into shape when you try to open it.
You will know a dough ball is ready to shape when you poke it gently and the indentation fills back slowly but does not spring back immediately.
Timing Schedules
One of the best things about poolish is how flexible it is. Here are three schedules that cover the most common scenarios.
Friday Night Pizza (Weeknight Schedule)
| Time | Step |
|---|---|
| Thursday, 10:00 PM | Mix poolish (0.3g yeast) |
| Friday, 11:00 AM | Poolish is mature. Mix final dough |
| Friday, 11:30 AM | Finish kneading. Begin bulk ferment |
| Friday, 1:00 PM | Divide and ball. Place in fridge |
| Friday, 5:30 PM | Remove dough from fridge |
| Friday, 7:00 PM | Shape and bake |
Saturday Night Pizza (Relaxed Weekend Schedule)
| Time | Step |
|---|---|
| Friday, 10:00 PM | Mix poolish (0.3g yeast) |
| Saturday, 10:00 AM | Poolish is mature. Mix final dough |
| Saturday, 10:30 AM | Finish kneading. Begin bulk ferment |
| Saturday, 12:00 PM | Divide and ball. Place in fridge |
| Saturday, 5:00 PM | Remove dough from fridge |
| Saturday, 6:30 PM | Shape and bake |
Next-Day Pizza (Maximum Flavor, 48-Hour Cold Ferment)
| Time | Step |
|---|---|
| Wednesday, 10:00 PM | Mix poolish (0.3g yeast) |
| Thursday, 10:00 AM | Poolish is mature. Mix final dough (skip extra yeast) |
| Thursday, 10:30 AM | Finish kneading. Begin bulk ferment |
| Thursday, 12:00 PM | Divide and ball. Place in fridge |
| Saturday, 4:30 PM | Remove dough from fridge |
| Saturday, 6:00 PM | Shape and bake |
Troubleshooting
The poolish did not rise much after 12 hours
Your kitchen is probably too cold. Below about 64°F (18°C), fermentation slows significantly. Move the container somewhere warmer (top of the fridge, inside the oven with just the light on) and give it a few more hours. Next time, use slightly warmer water or increase the yeast to 0.5g.
The poolish is very bubbly but liquid-y and flat
It likely went past peak maturity. The gluten structure that was trapping gas has fully broken down. If it does not smell strongly sour or of acetone, use it - just expect the final dough to need a little extra kneading to build structure, and consider adding the optional extra yeast.
The final dough is really sticky and hard to handle
This is normal, especially at 70% hydration. Wet your hands instead of flouring them. If you skipped the autolyse, try it next time - that 20-minute rest after mixing makes a dramatic difference in how manageable the dough feels. A bench scraper is your best friend here.
The dough tears when I try to stretch it
Two possible causes. First, the dough might be too cold - let it warm up longer before shaping. Second, you may not have developed enough gluten during the bulk ferment. If you only did one or two sets of stretch and folds, try adding more sets next time. You can also check gluten development with the windowpane test after bulk ferment: pull a small piece of dough and stretch it thin. If it tears before becoming translucent, it needs more folding or a longer rest.
The crust is dense and does not have the open crumb I expected
The most common cause is shaping technique. If you press out all the gas when opening the dough ball, you lose the irregular, airy structure that poolish creates. Press gently from the center outward, leaving a puffy border, and let gravity help stretch the dough rather than pressing it flat.
Under-proofing is another common culprit. If the dough balls went straight from the fridge to the oven without enough time to warm up and relax, they will bake up tighter and denser.
The crust tastes bland despite using poolish
Check your salt. 2.5% of total flour weight is the minimum I would use for pizza (25g for 1,000g flour). Below that, the crust will taste flat no matter how good the fermentation was. Salt is not just about saltiness - it amplifies all the other flavors the poolish developed.
Also check your oven temperature. Poolish crust needs high heat (500°F minimum in a home oven, 700-900°F in a pizza oven) to get proper caramelization and Maillard browning. At lower temperatures, you bake out the moisture before those reactions have a chance to develop.
Frequently Asked Questions
Can I use a poolish with the PizzaLogic calculator?
Yes - the example recipe in this guide was generated by the PizzaLogic poolish dough calculator. Select poolish as your preferment type and the calculator splits all the ingredients between the poolish and the final dough, adjusts yeast amounts based on your fermentation schedule, and generates step-by-step instructions. It is the fastest way to get a dialed-in poolish recipe for any number of dough balls, hydration level, or ball weight.
Can I use active dry yeast instead of instant?
Yes. Use the same weight. The old advice about needing to "proof" active dry yeast in warm water first is mostly outdated for modern active dry yeast, but dissolving it in your room temperature water for 5 minutes before adding flour is still good practice. It hydrates the yeast granules and ensures even distribution.
Can I make the poolish bigger or smaller relative to the total dough?
Yes. The example recipe above uses a poolish that accounts for 30% of the total flour, which is a good default. You can adjust this in the PizzaLogic poolish calculator - some bakers use 40-50% of their total flour in the poolish for even more flavor complexity, but the trade-off is a weaker gluten network in the final dough. Going above 50% starts to make the dough hard to handle.
Going below 20% still improves flavor noticeably over a direct dough, but the effect is more subtle.
What is the difference between a poolish and a sourdough starter?
Both are pre-ferments, but they use different yeast sources. A poolish uses a small amount of commercial yeast. A sourdough starter uses wild yeast and bacteria captured from the environment. Sourdough produces more acidity and a tangier flavor profile. Poolish produces a milder, sweeter, more universally approachable flavor.
Poolish is also far more predictable and consistent. Wild yeast cultures vary in strength depending on temperature, feeding schedule, and dozens of other variables. Commercial yeast in a poolish behaves the same way every time.
Can I freeze poolish pizza dough?
You can freeze the finished dough balls after shaping. Wrap them tightly in plastic wrap and freeze for up to 3 months. Thaw in the refrigerator overnight, then bring to room temperature for 1-2 hours before shaping.
Do not freeze the poolish itself. The yeast activity and enzymatic processes that make it valuable are lost during freezing and thawing.
Ready to build your own poolish pizza dough recipe? The PizzaLogic poolish dough calculator generates a complete poolish recipe with precise ingredient splits and step-by-step instructions - just plug in your number of dough balls, target hydration, and fermentation schedule.