There is a version of this article that just tells you to dump ingredients in a bread maker and walk away. That version is fine. It will get you pizza. But you are here because you want to actually understand what is happening inside that machine - and how to use it as a real tool instead of a shortcut you're not sure will work well.
A bread machine as a mixer was actually my introduction to homemade pizza dough - my sister Laura and I had pizza nights with friends and the dough always came out of an old bread machine with decent results. Done right, bread machine pizza dough is not a compromise. It is legitimately good dough that happens to require almost zero hands-on effort.
This guide covers the real details - not just the recipe, but the why behind every decision, the mistakes that will trip you up, and the tweaks that take bread machine pizza dough from "good enough" to genuinely impressive.
Why a Bread Machine Actually Works for Pizza Dough
The standard pitch is convenience, and sure, that is part of it. But there are actual mechanical reasons why a bread maker produces consistent pizza dough, and understanding them helps you troubleshoot when things go sideways.
Temperature control is the big one. Yeast is fussy about temperature. It starts getting active around 75°F, hits its sweet spot between 80°F and 100°F, and starts dying off above 120°F. Your kitchen could be 65°F in January or 85°F in August, and that swing alone is enough to make identical recipes behave completely differently. A bread machine's Dough cycle gently warms the chamber, creating a stable environment somewhere around 80°F to 85°F. That consistency is genuinely hard to replicate on your counter without babysitting a thermometer.
The kneading is more consistent than most people can do by hand. Not better, necessarily - a skilled hand-kneader can develop gluten beautifully - but more repeatable. The machine applies steady, rhythmic force for a set time. It does not get tired, speed up, or forget to fold. For people who are still developing a feel for when dough is properly developed, this repeatability is huge.
Timing is automatic. The Dough cycle on most machines runs about 90 minutes total - roughly 15 to 20 minutes of kneading followed by 60 to 70 minutes of rising. You do not need to set timers, check on it, or remember to come back. It beeps when it is done. That is genuinely useful when you are juggling the rest of dinner prep.
The one thing a bread machine cannot do is a long, slow cold fermentation, which is where you get the complex, slightly tangy flavor of great pizzeria dough. But there is a workaround for that covered later in this guide.
The Recipe: Bread Machine Pizza Dough
This makes roughly 680g (about 1.5 pounds) of dough - enough for two 10 to 12 inch pizzas at about 340g each, or one larger sheet-style pie. If you need to scale up or adjust for a specific pizza style, the PizzaLogic calculator will do the math for you.
Ingredients
- 393g bread flour (about 3 cups, spooned and leveled)
- 255g lukewarm water (about 1 cup + 1 tablespoon, between 100°F and 110°F)
- 20g extra virgin olive oil (about 1 1/2 tablespoons)
- 8g kosher salt (1 1/4 teaspoons - reduce slightly if using fine table salt)
- 4g sugar (1 teaspoon)
- 4g bread machine yeast or instant yeast (about 1 1/4 teaspoons)
Baker's Percentages
If you are into dough math - or want to understand how this recipe relates to others - here is the breakdown in baker's percentages, where everything is expressed as a percentage of the flour weight:
- Flour: 100%
- Water: 65%
- Salt: 2%
- Oil: 5%
- Sugar: 1%
- Yeast: 1%
This is a 65% hydration dough. That level is deliberate - it is wet enough to puff nicely in a hot oven and give you a light crumb, but dry enough to be very manageable during shaping. If you are new to stretching pizza dough by hand, 65% is forgiving. It holds its shape on the counter, does not stick to everything, and does not require the kind of confident, fast handling that wetter doughs demand. As you get more comfortable, you can experiment with pushing hydration up toward 68% or 70% for a lighter, more open crumb - the PizzaLogic calculator makes it easy to adjust.
For more on how hydration affects your crust, check out the complete guide to pizza dough hydration.
Loading Order (This Actually Matters)
The order you put ingredients into the bread machine pan is not arbitrary. It directly affects whether the yeast activates properly or gets killed before the cycle even starts.
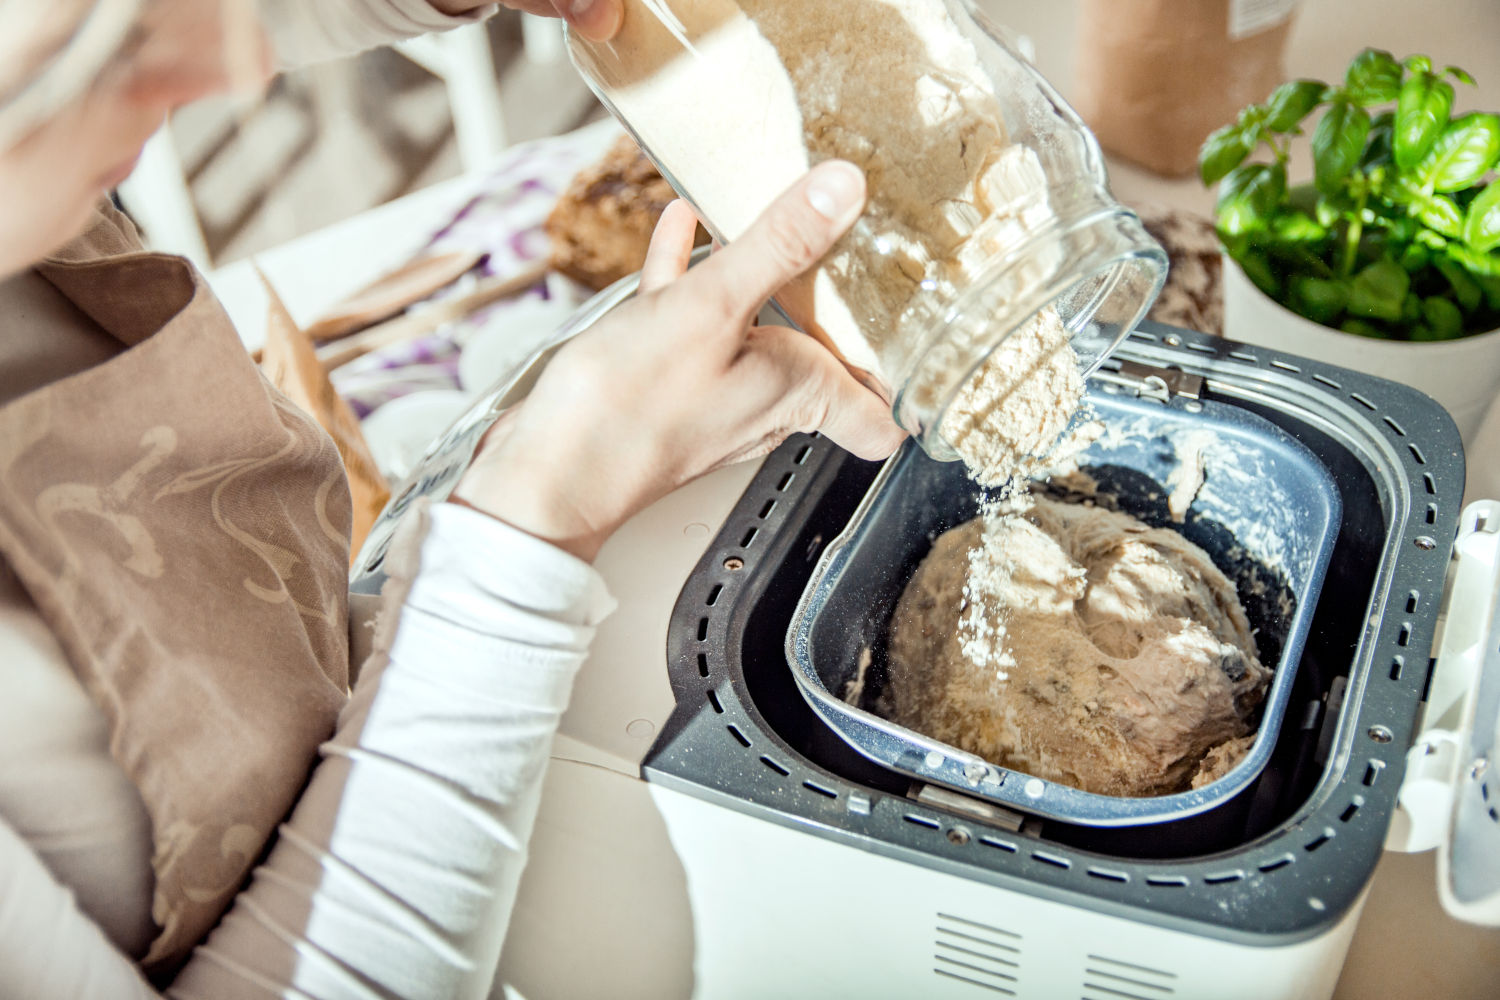
Step 1: Liquids on the bottom. Pour the lukewarm water and olive oil into the bread machine pan.
Step 2: Flour blanket. Add all the bread flour on top of the liquids, making sure it completely covers the surface. Sprinkle the salt and sugar around the edges of the flour, away from the center.
Step 3: Yeast in a dimple. Make a shallow well in the center of the flour with your finger and pour the yeast into it.
The logic here is simple: you want a physical barrier of dry flour separating the yeast from the liquid and the salt until the machine starts mixing. Salt in direct contact with yeast before hydration can damage or kill yeast cells. And if the yeast touches the warm water too early, it starts fermenting before the kneading cycle has a chance to distribute it evenly through the flour.
This layering technique is standard across almost every bread machine pizza crust recipe worth following. It takes five extra seconds and prevents the most common bread machine dough failure.
Running the Cycle
Select the Dough setting on your bread machine and start it. On most machines, this runs for roughly 90 minutes. The machine will knead the dough for 15 to 20 minutes, then maintain a warm environment while the dough rises for the remaining time.
That is it. You have one job left before you can truly walk away - the five-minute check.
The Five-Minute Check (Do Not Skip This)
About five to ten minutes into the kneading cycle, open the lid and look at the dough. This single habit will prevent more bad pizza than any other tip in this article.
You are looking for a smooth, slightly tacky ball of dough that is pulling cleanly away from the sides and bottom of the pan. It should be clinging to the kneading paddle but not plastered all over the walls of the container.
If the dough is shaggy, crumbly, or bouncing around in dry chunks: It is too dry. Add water one tablespoon at a time, letting the machine mix for 30 seconds between additions. Usually one or two tablespoons fixes it.
If the dough is a wet, sticky mess pooling at the bottom and not forming a ball: It is too wet. Add flour one tablespoon at a time, same approach - add, wait, evaluate.
If you see a smooth ball with just a slight stick when you poke it with a finger: Perfect. Close the lid and leave it alone.
Why does this happen even when you measure carefully? Flour absorbs different amounts of water depending on the brand, how it was stored, and the humidity in your kitchen. The same flour in a dry winter kitchen behaves differently than it does in a humid summer one. And if you are measuring flour by cups instead of weight, a single cup can vary by 30g or more depending on how you scoop it - that alone is enough to throw off the dough. The five-minute check accounts for all those variables.
Choosing the Right Flour for Bread Machine Pizza Dough
Bread flour is the default recommendation for this recipe, and for good reason. Its higher protein content (typically 12% to 14%) develops a stronger gluten network during the machine's kneading cycle, which gives you that chewy, stretchy texture you want in a pizza crust.
But it is not your only option:
Bread flour (recommended): Best overall balance of chew, structure, and oven spring. Brands like King Arthur Bread Flour (12.7% protein) are reliable and widely available. This is what the recipe is built around.
All-purpose flour: Works fine, especially if bread flour is not on hand. The protein content is lower (around 10% to 12%), so the crust will be slightly more tender and less chewy. You may need to reduce the water by a tablespoon or two since AP flour absorbs less liquid. The guide to choosing pizza dough flour covers the differences in more detail.
"00" flour: The classic choice for Neapolitan-style pizza, but it behaves differently in a bread machine. Most 00 flours have a protein content similar to all-purpose flour but a finer grind, which means they absorb water differently and develop gluten with less aggressive kneading. A bread machine's kneading action can over-develop 00 flour. It will work, but if you are investing in 00 flour, you are probably better off hand-mixing and doing a long cold ferment to get the best results from it.
Whole wheat flour (as a partial substitution): Replacing 25% to 30% of the bread flour with whole wheat adds a nutty depth and some extra fiber. Go beyond 30% and the dough gets heavy and dense - the bran in whole wheat flour literally cuts through gluten strands. If you go this route, increase the water by a tablespoon and expect a slightly longer rise time.
Yeast: What Kind and How Much
The recipe calls for bread machine yeast or instant yeast, and there is a reason for that.
Bread machine yeast and instant yeast are functionally the same thing - finely ground yeast particles that dissolve and activate on contact with moisture during mixing. They do not need to be bloomed in warm water first. This is exactly what you want in a bread machine, where all the ingredients go in at once.
Active dry yeast has a coarser granule and a higher percentage of dead cells on the outside. It traditionally needs to be dissolved in warm water (105°F to 110°F) for 5 to 10 minutes before use to "proof" it and get it going. You can use it in a bread machine, but you need to add it to the water layer instead of keeping it separated in the flour. This somewhat defeats the barrier method, and the results are slightly less consistent.
Fresh yeast (cake yeast) can also work, but the conversion ratio is different (roughly 3x the weight of instant yeast) and it has a shorter shelf life. Unless you are baking very frequently and can find it reliably, instant yeast is the practical choice.
If you want a full breakdown of how different yeast types perform in pizza dough - including tips on reducing yeast for longer ferments - the yeast types guide covers it thoroughly.
After the Beep: Handling and Shaping Your Dough
When the machine signals that the Dough cycle is done, your dough has been kneaded and has completed a first rise. It should have roughly doubled in size and feel soft, puffy, and slightly tacky.
Dividing
Turn the dough out onto a lightly floured surface and use a bench scraper to divide it into two equal portions (about 340g each if you want to be precise - a kitchen scale is your friend here). If you are making a larger single pizza, keep it as one piece.
Balling
Form each piece into a tight, smooth ball. The technique: tuck the edges underneath while rotating the dough on the counter, creating surface tension on the top. You want a taut skin on the outside - this helps the dough hold its shape during the final rise and keeps the air structure intact.
The Second Rest
Cover the dough balls with a damp kitchen towel or loosely with plastic wrap and let them sit at room temperature for 20 to 30 minutes.
20 to 30 minutes is the minimum to get the gluten to relax enough to stretch without snapping back. If you have an hour, even better - the dough gets progressively easier to work with. But 20 minutes gets the job done.
During the kneading cycle, the gluten network got wound up tight. If you try to stretch the dough immediately, it will snap back like a rubber band. That resting period lets the gluten relax, making the dough dramatically easier to shape. If you have ever fought with dough that keeps shrinking back on you, this is the fix.
Shaping Without a Rolling Pin
Put the rolling pin in the drawer. A rolling pin crushes the gas bubbles that the yeast just spent an hour building. Those bubbles are what give your crust lift, texture, and that irregular charred-bubble structure you see on good pizza.
Instead:
- Place the dough ball on a lightly floured surface.
- Use your fingertips to press the dough outward from the center, working in a circle. Leave about a half-inch border around the edge untouched - this becomes your raised cornicione (the puffy crust rim).
- Once you have a rough disc about 6 to 8 inches across, pick it up and drape it over the backs of your fists. Let gravity stretch it, rotating slowly, until it reaches your target size.
- If the dough tears, press the edges back together - small tears are not a big deal and usually seal up in the oven.
This takes some practice. The first few times might look rough, and that is completely fine. A rustic-looking pizza that tastes incredible beats a perfectly round mediocre one.
Baking: Getting the Most Out of Your Dough
Everything up to this point has been about building great dough. The bake is where you either lock in that quality or waste it.
Oven Temperature
Crank your oven as high as it goes. For most home ovens, that is 500°F or 550°F. If your oven has a convection setting, use it - the circulating air helps the crust brown evenly and reduces bake time slightly.
This is non-negotiable. Pizza needs intense, direct heat to get the right balance of crispy exterior and soft interior. At 350°F or 400°F, the crust dries out before it browns, and you end up with something that tastes like bread with toppings.
Preheat Time
Give your oven at least 45 minutes to preheat - longer if you are using a pizza stone or baking steel. The walls, floor, and especially any baking surface need to be fully saturated with heat. An oven that reads 500°F on the thermostat after 15 minutes still has cold walls and a stone that might only be at 350°F in the center.
Pizza Stone vs. Baking Steel vs. Sheet Pan
Baking steel: The best option for most home bakers. Steel conducts heat roughly 20 times more efficiently than a ceramic stone, meaning your crust gets a harder, faster sear on the bottom. This translates to better oven spring (the initial puff when dough hits extreme heat) and a crispier base. A 1/4 inch steel plate preheated at 550°F will change your pizza permanently.
Pizza stone: The classic choice and still very good. It provides excellent heat retention and gives you nice browning. The main downside is that ceramic stones are fragile - they crack if you thermal-shock them (cold stone into a hot oven, or water dripped on a hot stone). Preheat it with the oven.
Sheet pan (inverted): If you do not have a stone or steel, flip a heavy sheet pan upside down, preheat it for 30 minutes at max temperature, and launch your pizza onto the flat underside. It is not as good as a stone or steel, but it is dramatically better than building the pizza on a cold pan and sliding it in.
Bake Time
At 500°F to 550°F with a preheated stone or steel, most 10 to 12 inch pizzas take 7 to 10 minutes. You are looking for:
- Crust that is golden brown with some darker charred blisters
- Cheese fully melted with a few browned spots
- Bottom of the crust is firm, dry, and sounds hollow when tapped
If you have a pizza oven that reaches 700°F or above, you are looking at 3 to 5 minutes, and you will want to rotate the pizza midway through.
Level Up: Cold Fermentation After the Bread Machine
Here is where you can take bread machine dough from good to exceptional, and it is the trick most bread machine pizza dough recipes never mention.
The Dough cycle on your bread machine gives you a perfectly kneaded, once-risen dough. That dough is ready to use immediately, and it will make good pizza. But if you want more complex flavor - that slightly tangy, yeasty depth you taste at a great pizzeria - the move is to slow everything down with cold fermentation.
After the machine finishes, instead of shaping and baking right away:
- Divide and ball the dough as described above.
- Place each dough ball in a lightly oiled container with a lid (deli containers work great).
- Put the containers in the refrigerator.
- Wait at least 24 hours. 48 to 72 hours is even better.
During cold fermentation, the yeast slows way down but does not stop. It continues to produce carbon dioxide and, crucially, generates organic acids and alcohol that create flavor complexity you simply cannot get from a 90-minute room-temperature rise. The dough also becomes more extensible (easier to stretch) and develops a better texture when baked.
When you are ready to use it, pull the dough from the fridge and let it come to room temperature for 60 to 90 minutes before shaping. It will be slightly puffier and much more relaxed than when you put it in.
One adjustment: If you plan to cold-ferment, you can reduce the yeast in the recipe by about half (use about 2g / 3/4 teaspoon instead of 4g). Less yeast means slower fermentation, which gives the dough more time to develop flavor before the yeast exhausts the available sugars. The PizzaLogic calculator can help you adjust yeast amounts based on your planned fermentation time.
Freezing Bread Machine Pizza Dough
Life gets busy. One of the best things about this recipe is that it freezes well, and having dough in the freezer means pizza night is always an option.
To freeze: After the Dough cycle completes, divide and ball the dough. Lightly coat each ball with olive oil, wrap tightly in plastic wrap, then place in a freezer bag with as much air removed as possible. It keeps well for up to 3 months.
To thaw: Transfer the dough from the freezer to the refrigerator the night before you plan to use it. Let it finish thawing and warming up on the counter for 60 to 90 minutes before shaping. Do not microwave it or try to rush the thaw - uneven temperatures will give you a dough ball that is warm and overproofed on the outside and still frozen in the center.
The texture after freezing is slightly different from fresh - the crust may be marginally less airy - but for a weeknight pizza, it is excellent and a massive time-saver.
Troubleshooting Common Bread Machine Pizza Dough Problems
The dough did not rise at all: The most common cause is dead yeast. Check the expiration date, and make sure your water was not too hot (above 120°F kills yeast quickly). Also verify that the yeast was not sitting in direct contact with the salt before the cycle started.
The dough rose but collapsed when you opened the machine: Likely overproofed. This can happen if your kitchen is very warm and the machine's internal temperature pushed the dough past its peak. Use the dough immediately - it will still make decent pizza, just with slightly less oven spring. If this happens consistently, try reducing the yeast by a quarter teaspoon.
The dough is tough and dense after baking: Usually means the dough was too dry (not enough water) or was kneaded with too much extra flour on the counter during shaping. The five-minute check during kneading is your best prevention here.
The crust is pale and does not brown: Your oven is not hot enough, or you did not preheat long enough. Make sure you are at maximum temperature with at least 45 minutes of preheating. A tiny pinch of sugar on the dough surface before baking can also help with browning.
The bottom of the crust is soggy: Too many wet toppings (fresh mozzarella that hasn't been drained, watery sauce, raw vegetables). Also, make sure your baking surface is fully preheated - a cold stone will steam the bottom of the dough instead of crisping it.
The dough sticks to the bread machine pan: The kneading paddle probably was not properly seated, or the non-stick coating on your pan is wearing out. A tiny spray of cooking oil in the pan before adding ingredients helps, but if it is a persistent issue, you may need a replacement pan.
Frequently Asked Questions
Can I make bread machine pizza dough with all-purpose flour?
Yes. The crust will be slightly softer and less chewy compared to bread flour, but it still makes perfectly good pizza. You may need to reduce the water by 1 to 2 tablespoons since all-purpose flour absorbs less liquid than bread flour.
Can I use active dry yeast instead of bread machine yeast?
You can, but you will need to bloom it first. Dissolve the yeast in the warm water with the sugar and let it sit for 5 to 10 minutes until it is foamy. Then pour that mixture into the bread machine pan as your liquid layer. The results are slightly less consistent than instant yeast, but it works.
How long does the dough last in the fridge?
Up to 72 hours is the sweet spot. Beyond that, the yeast starts to exhaust the available sugars and the dough can develop off flavors or become overly slack. If you need to store it longer, freeze it instead.
Can I make the dough on the regular Bread setting instead of Dough?
No - the regular Bread setting includes a full bake cycle, which will cook the dough into a loaf inside the machine. Always use the Dough setting, which stops after kneading and the first rise.
My bread machine does not have a Dough setting. What do I do?
Some older or very basic machines only have bake cycles. You can still use the machine for kneading - start the regular cycle and monitor it. Once the dough has been kneaded (usually 15 to 20 minutes in), manually stop the machine and remove the dough. Let it rise in a covered, lightly oiled bowl for about an hour at room temperature.
Does this recipe work for other pizza styles?
This dough is versatile enough for most home pizza applications - round pies on a stone, sheet pan pizza, grilled pizza, even calzones. For very specific styles like true Neapolitan (which traditionally uses no oil and no sugar) or deep-dish (which uses a different fat ratio), you will want a purpose-built recipe. The PizzaLogic calculator lets you dial in recipes for different styles.
Wrapping Up
A bread machine is not a cheat code. It is a tool - one that handles the two most tedious parts of pizza dough (kneading and proofing) with mechanical consistency, freeing you up to focus on shaping, topping, and baking. The dough that comes out of it is real dough, made from real ingredients, and when you take the time to understand the details - proper ingredient order, the five-minute check, cold fermentation, screaming-hot baking - the results speak for themselves.
If you want to experiment with different hydration levels, flour types, or yeast amounts, run the numbers through the PizzaLogic dough calculator before you start. It takes the guesswork out of scaling and adjusting, which is especially useful when you are tweaking a recipe to match your specific oven, flour, and preferences.
Now go make some pizza.